Mastering Tools in Shinkai: Settings, Import, and Usage
Welcome to part two of our series on Shinkai tools. If part one laid the groundwork by introducing you to the concept and potential of tools, this article dives into the practicalities: enabling the tools section, managing settings, importing tools, and using them seamlessly within the Shinkai app.
By the end of this guide, you’ll be equipped to navigate the Tools section confidently and use tools to enhance your workflows. Let’s get started!
Getting Started: Enabling the Tools Section
The Tools section isn’t immediately visible in Shinkai—it’s hidden to keep the interface clean for new users. Here’s how to enable it:
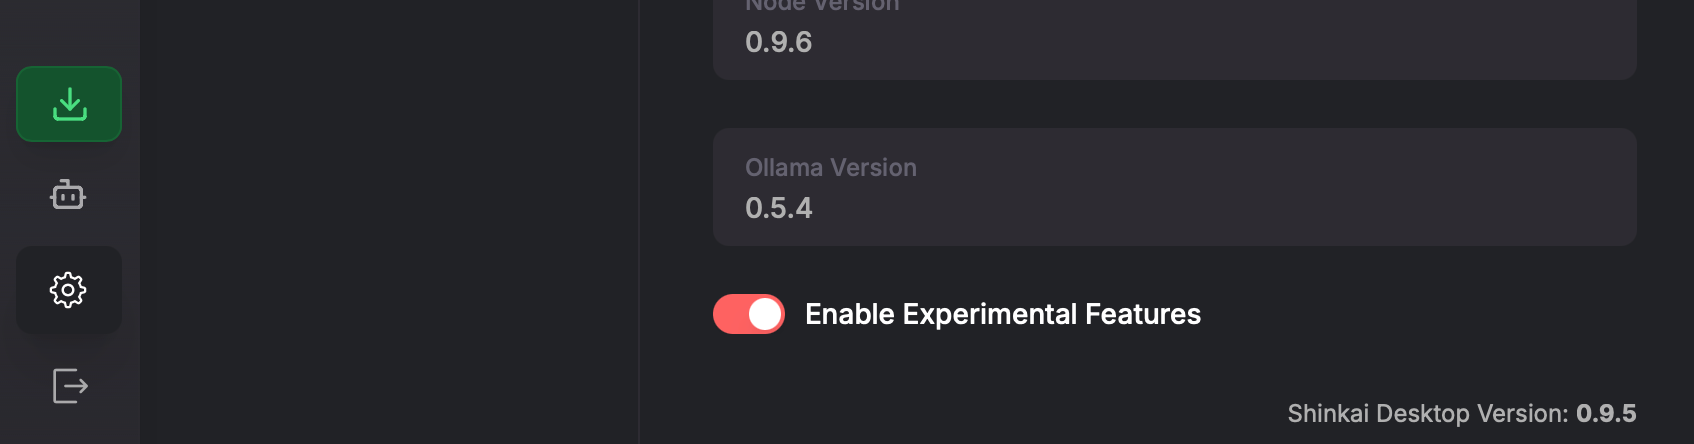
- Open Settings and navigate to General Settings.
- Scroll to the bottom and toggle Enable Experimental Features.
Once activated, a 🛠️ Shinkai Tools button will appear in the left menu. Click it to enter the Tools section and start exploring.
Navigating the Tools Section
Inside the Tools section, you’ll find a clear, intuitive layout designed for exploration and configuration.
Tool List
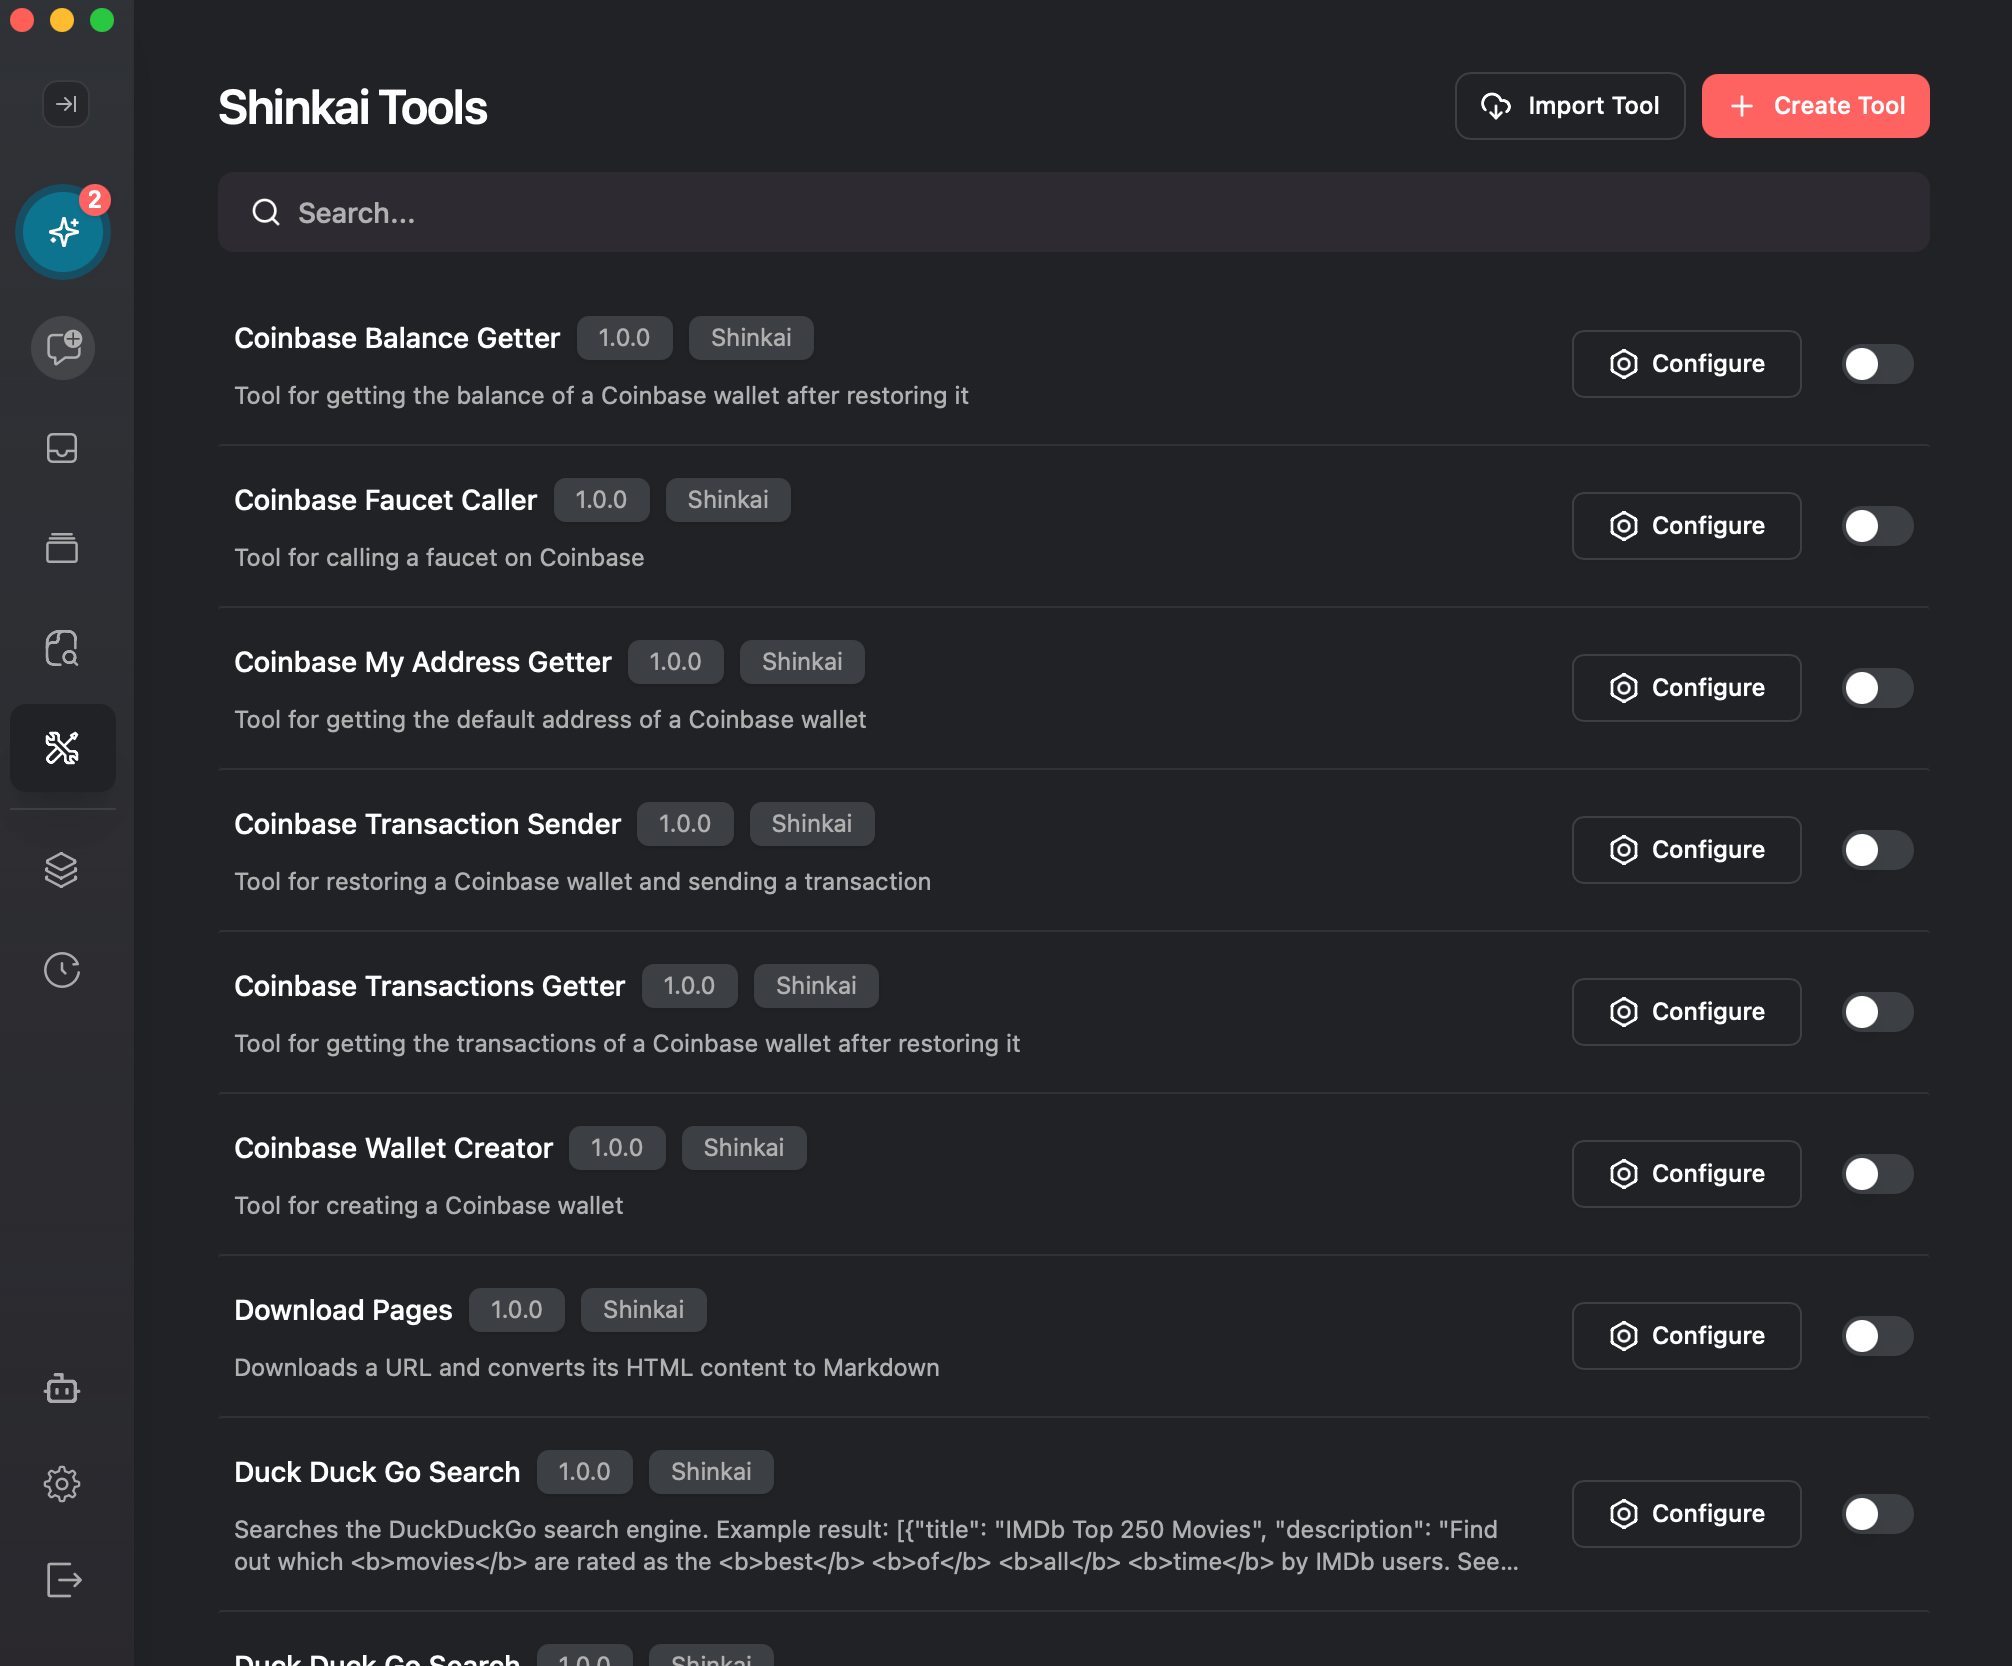
The tool list displays all the available tools at a glance. For each tool, you’ll see:
- Name and Description: Learn what each tool does and how it can help you.
- Version Tag: Stay informed about the tool’s current version.
- Author Credit: Identify whether a tool is created by Shinkai or by another contributor.
At the top of the list, a Search Bar allows you to quickly locate specific tools using keywords. Each tool also has an Enable/Disable Toggle, so you can activate only the ones you need for your workflow. Additionally, there’s a Create Tool button available in this section. While creating and editing a tool opens up endless customization possibilities, this topic will be covered in-depth in the next article of the series.
Individual Tool Configuration
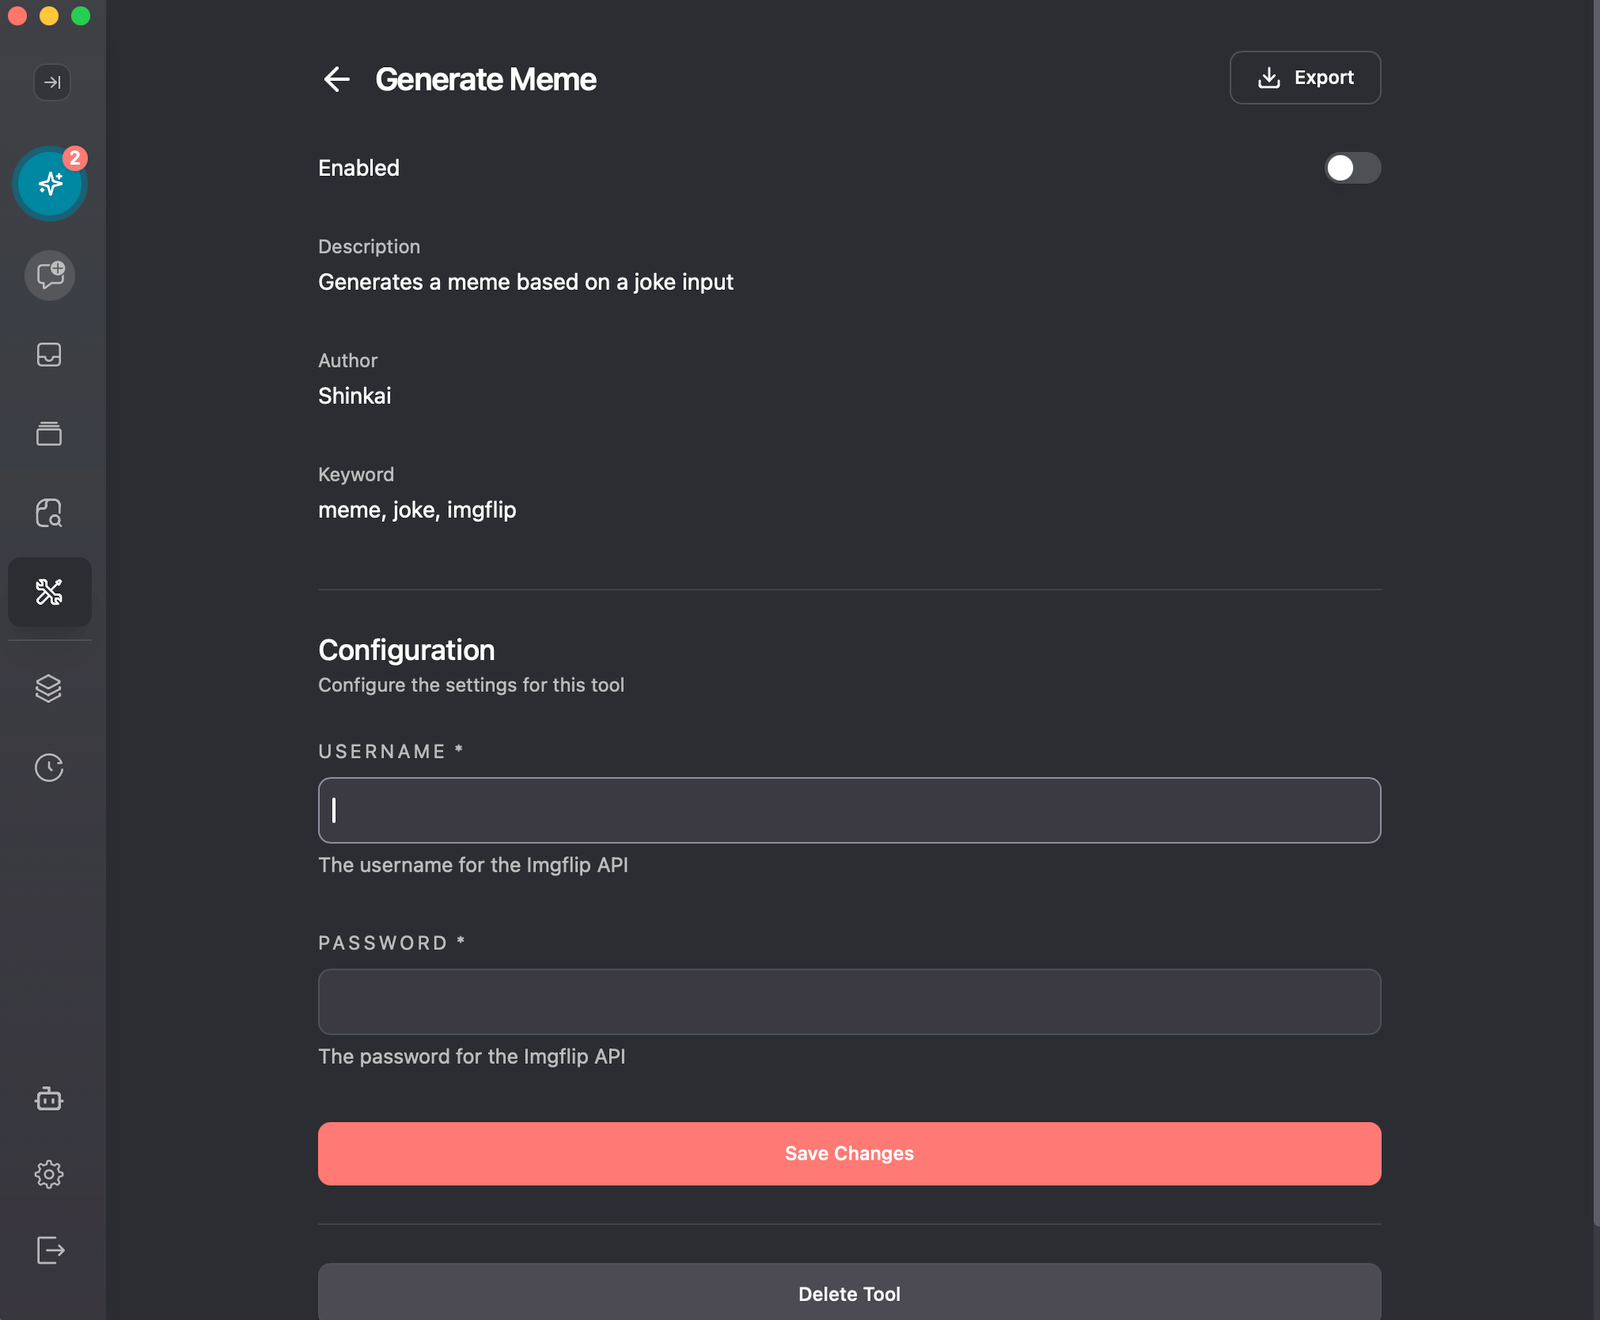
Clicking the Configure button next to a tool opens its dedicated configuration page. Here, you can:
- Set Up Parameters: Input API credentials or other necessary details for the tool to function. For example, the Email Fetcher tool requires IMAP credentials to connect to your email, while others like the DuckDuckGo Search tool are ready to use straight out of the box with no additional setup.
- Export Tools: Save the tool as a ZIP file to share with other Shinkai users.
- Delete Tools: Remove a tool from your system if you no longer need it.
Importing Tools
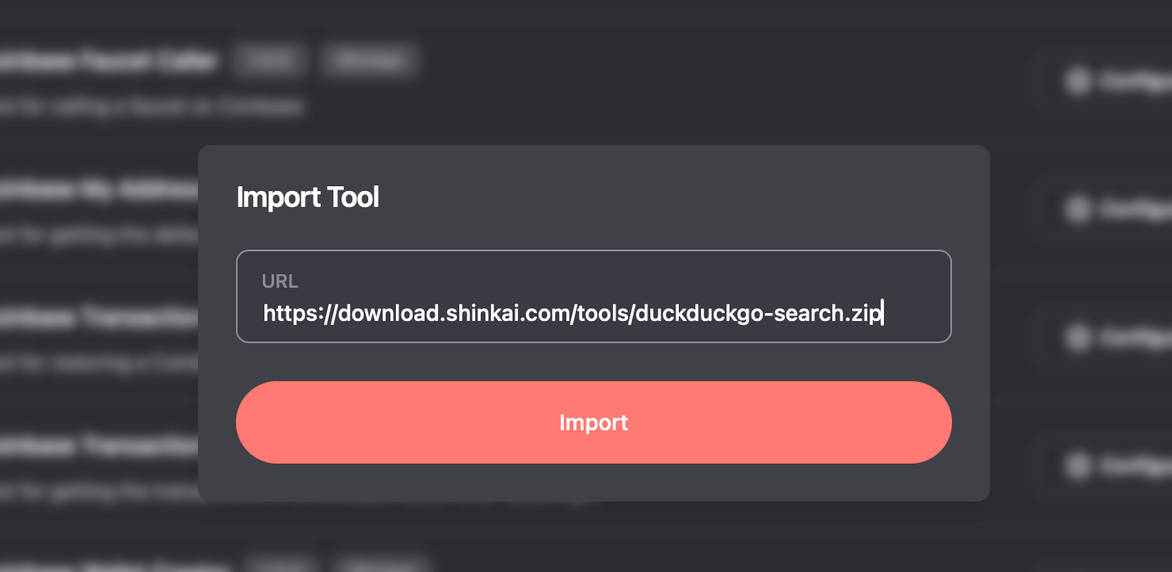
Want to add new functionality? Importing tools into Shinkai is a breeze:
- Ensure you have the download URL for the tool’s ZIP file.
- In the Tools section, click the Import Tool button.
- Paste the URL and follow the prompts to complete the process.
Whether it’s a tool shared by a colleague or one you found online, importing expands your possibilities.
Using Tools Inside the Shinkai App
This is where the magic happens. Tools integrate seamlessly into Shinkai chats, empowering you to perform tasks dynamically within conversations.
How to Use Tools in Chat
- Enable and Configure: Ensure your desired tool is active and set up in the Tools section.
- Start a Chat: Open a new or existing conversation.
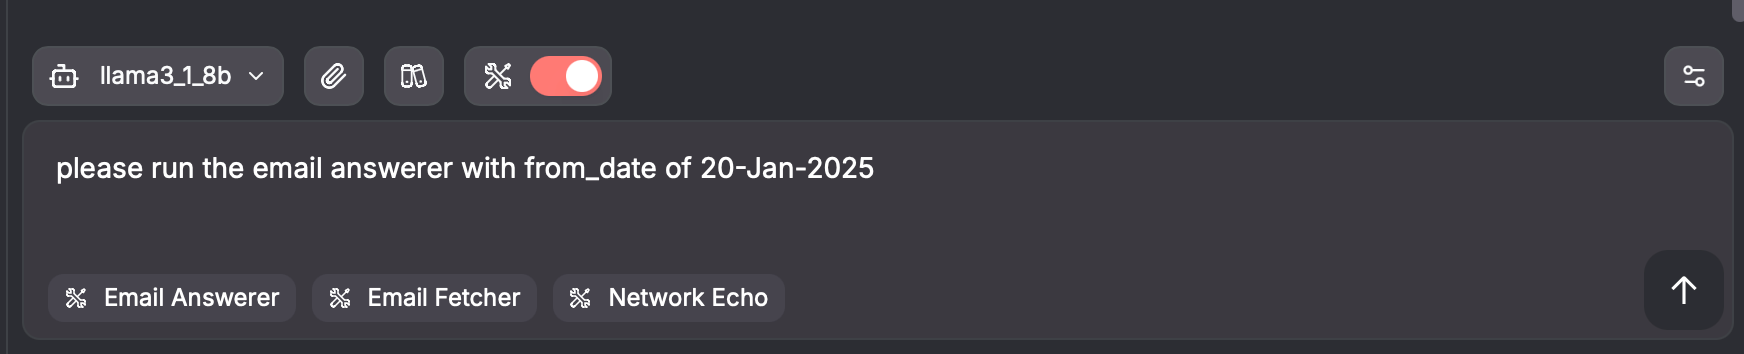
- Invoke the Tool:
- Begin typing your prompt in the chat.
- Shinkai will suggest relevant tools as clickable chips based on your input.
- Select a tool and provide any additional details.
For instance, if you’re using the Meme Generator, type a description of the meme you want. Shinkai will handle the rest, incorporating the output naturally into the chat.
Looking at the Execution Logs
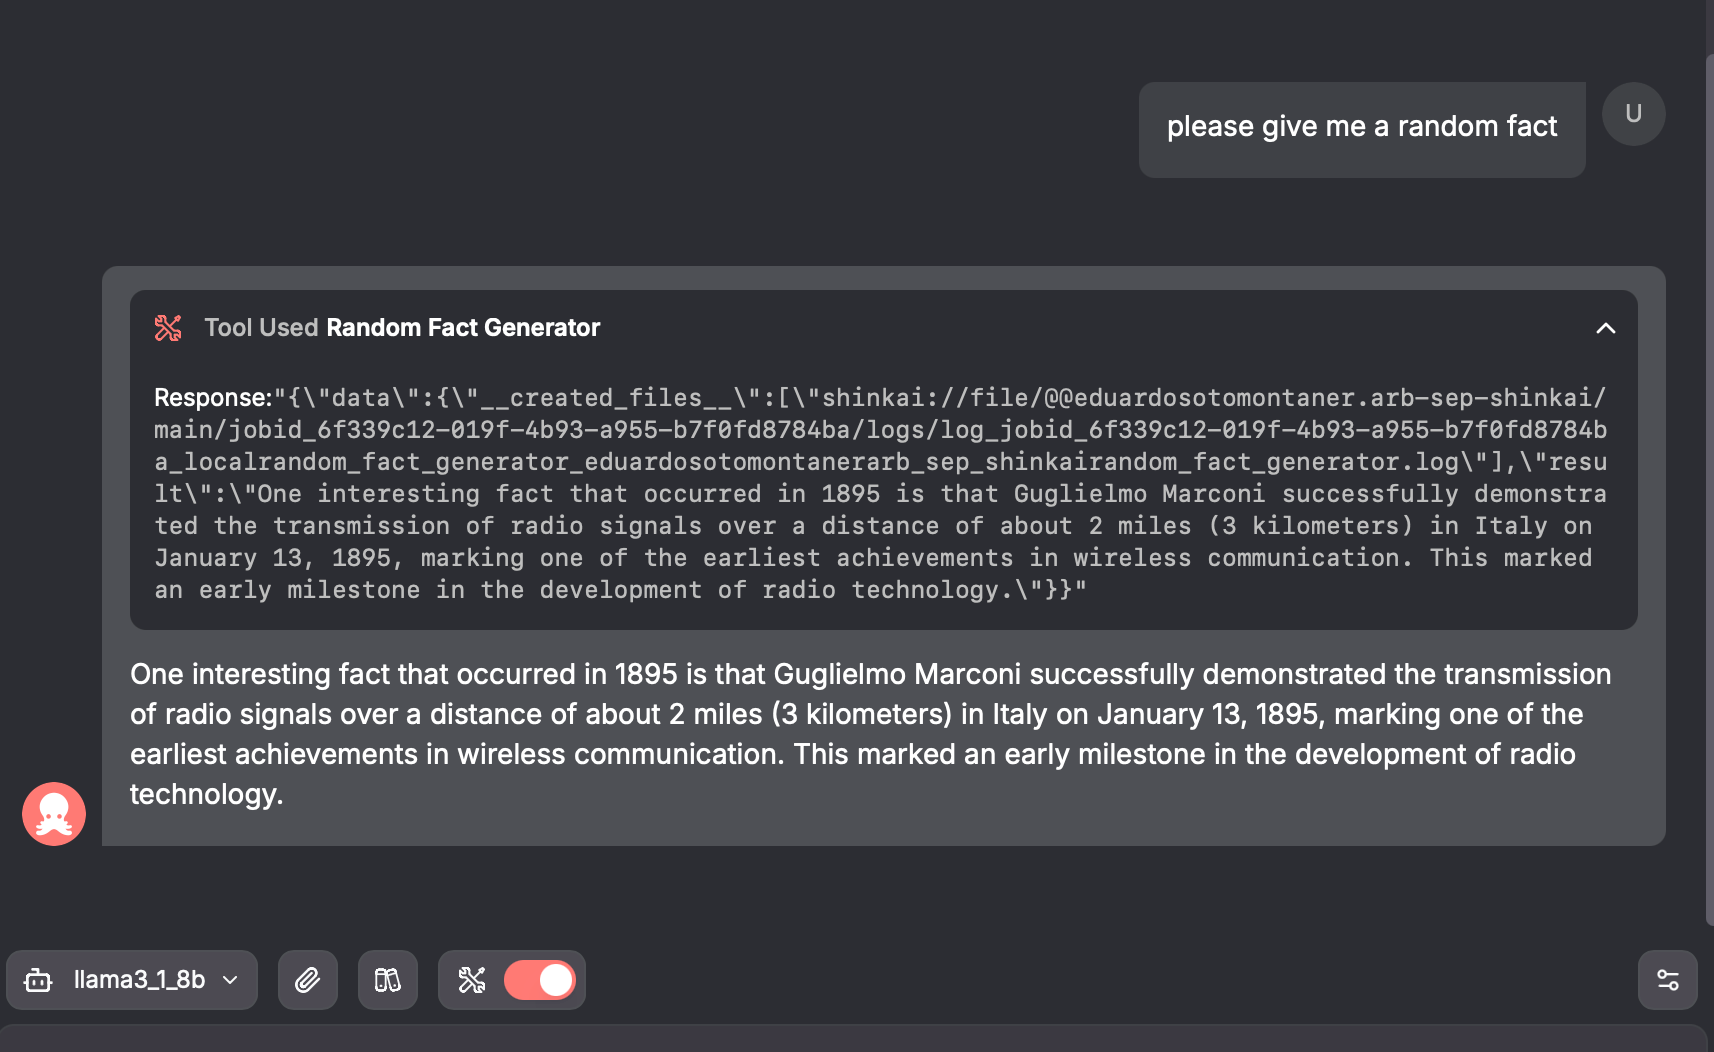
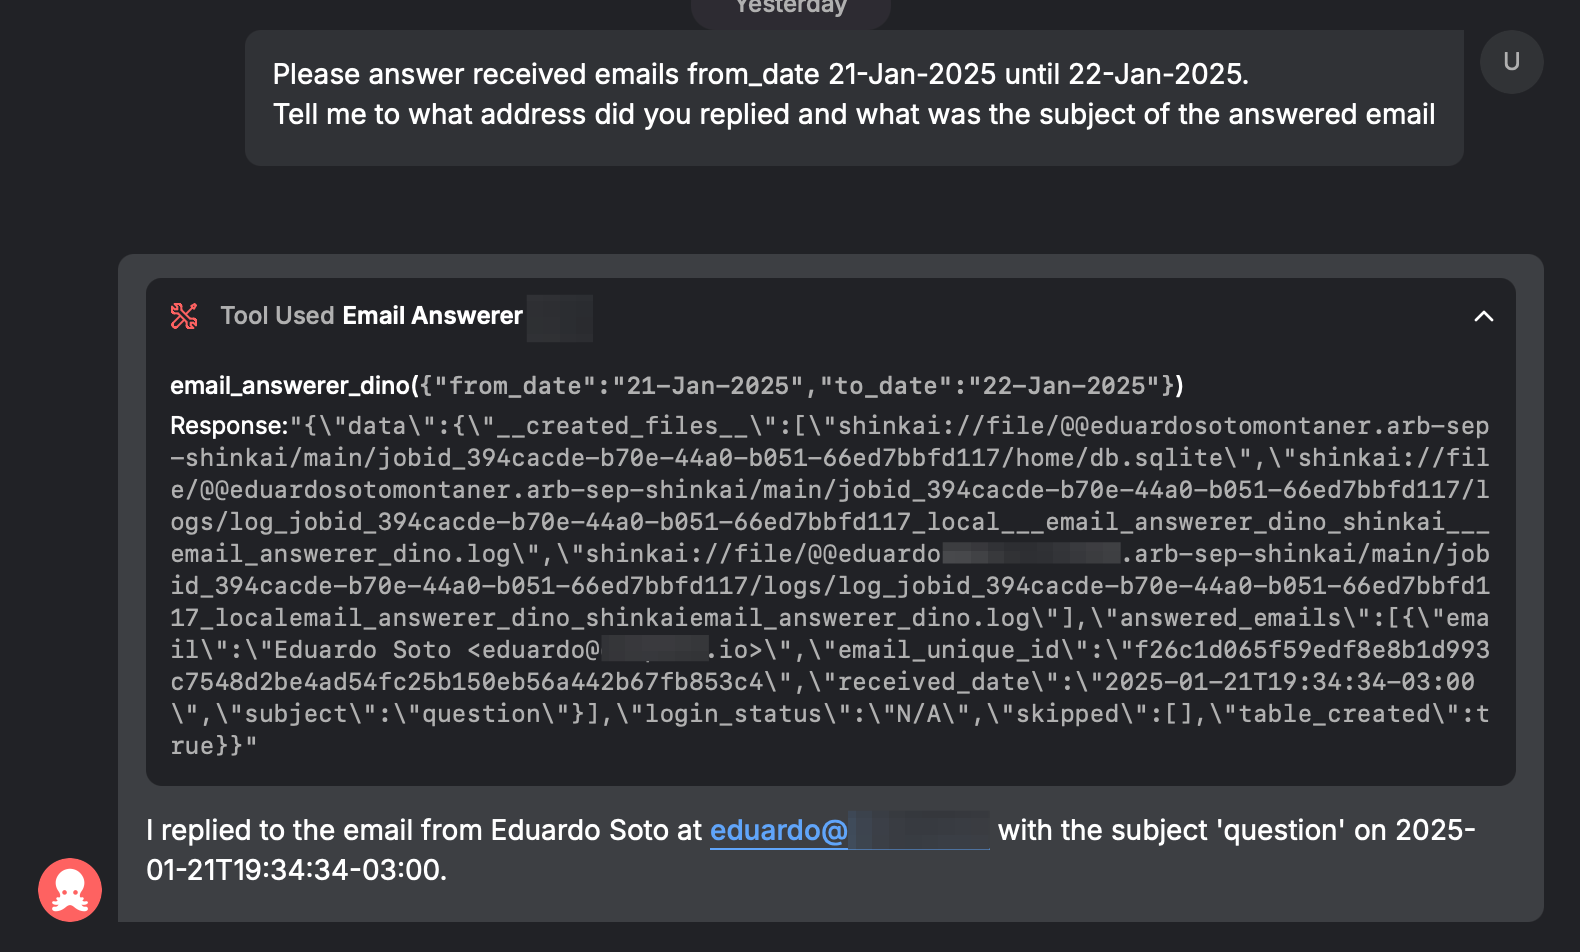
Transparency is key. Every tool execution generates a log that appears at the top of its response. This log displays raw output before the AI processes it, allowing you to see exactly what the tool produced. It’s a great way to troubleshoot or understand a tool’s behavior in detail.
Automating Tasks with Tools
Shinkai tools aren’t just reactive—they can be proactive too. Automate tasks with the Scheduled Tasks feature made to run tools at fixed intervals or specific times or craft advanced schedules with cron expressions, a precise way to define execution times. For example:
0 0 * * *→ Runs every day at midnight.0 */2 * * *→ Executes every 2 hours.0 22 * * 1-5→ Triggers at 10:00 PM from Monday to Friday.30 14 15 1 2025→ Runs at 2:30 PM on January 15th, 2025, ensuring it only runs once on this specific date and time.
Cron notation allows you to define complex schedules by specifying the exact minute, hour, day, month, and weekday for execution. This makes it especially versatile for unique scenarios, such as running a tool at an exact date and time or setting intricate recurring tasks. Additionally, crafting these cron expressions is an excellent use case for large language models (LLMs), which can help you generate, explain, and even validate them, just as they can with regular expressions.
To simplify this process further, the Cron Expression text box includes a list of clickable suggestions right below it. These pre-defined examples can be clicked to auto-fill the cron expression field, saving time and ensuring accuracy for common scheduling patterns.
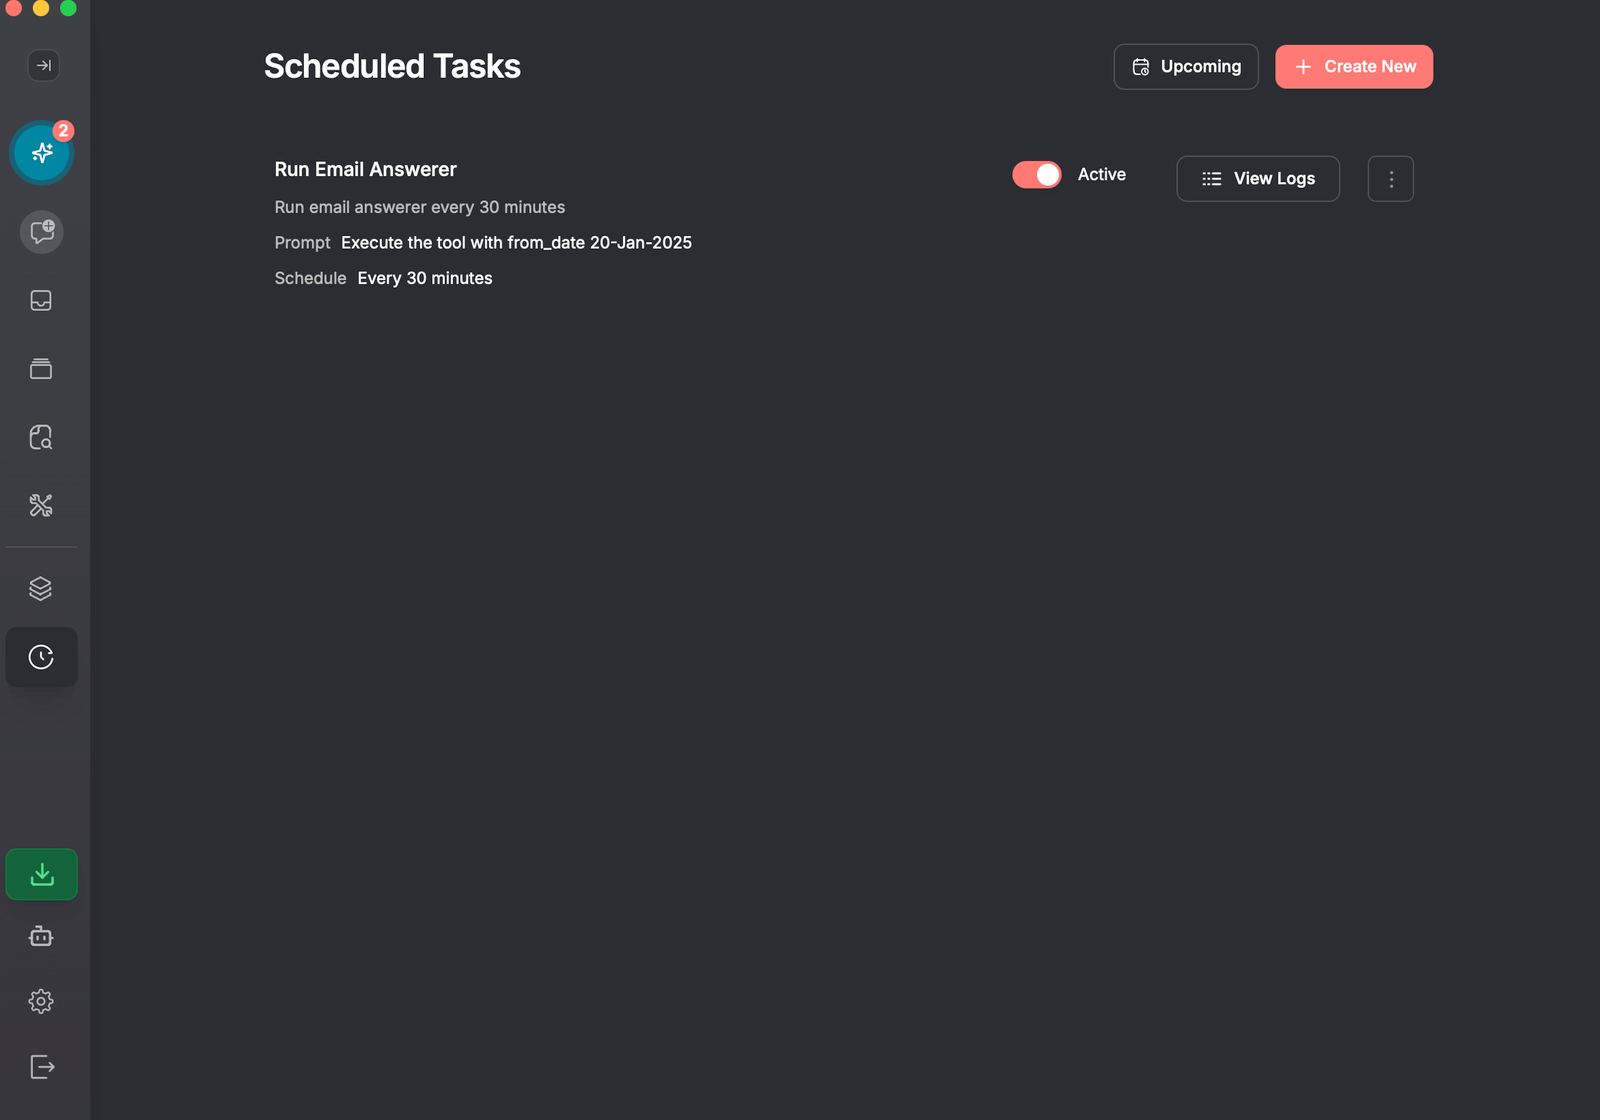
Creating your Scheduled Task
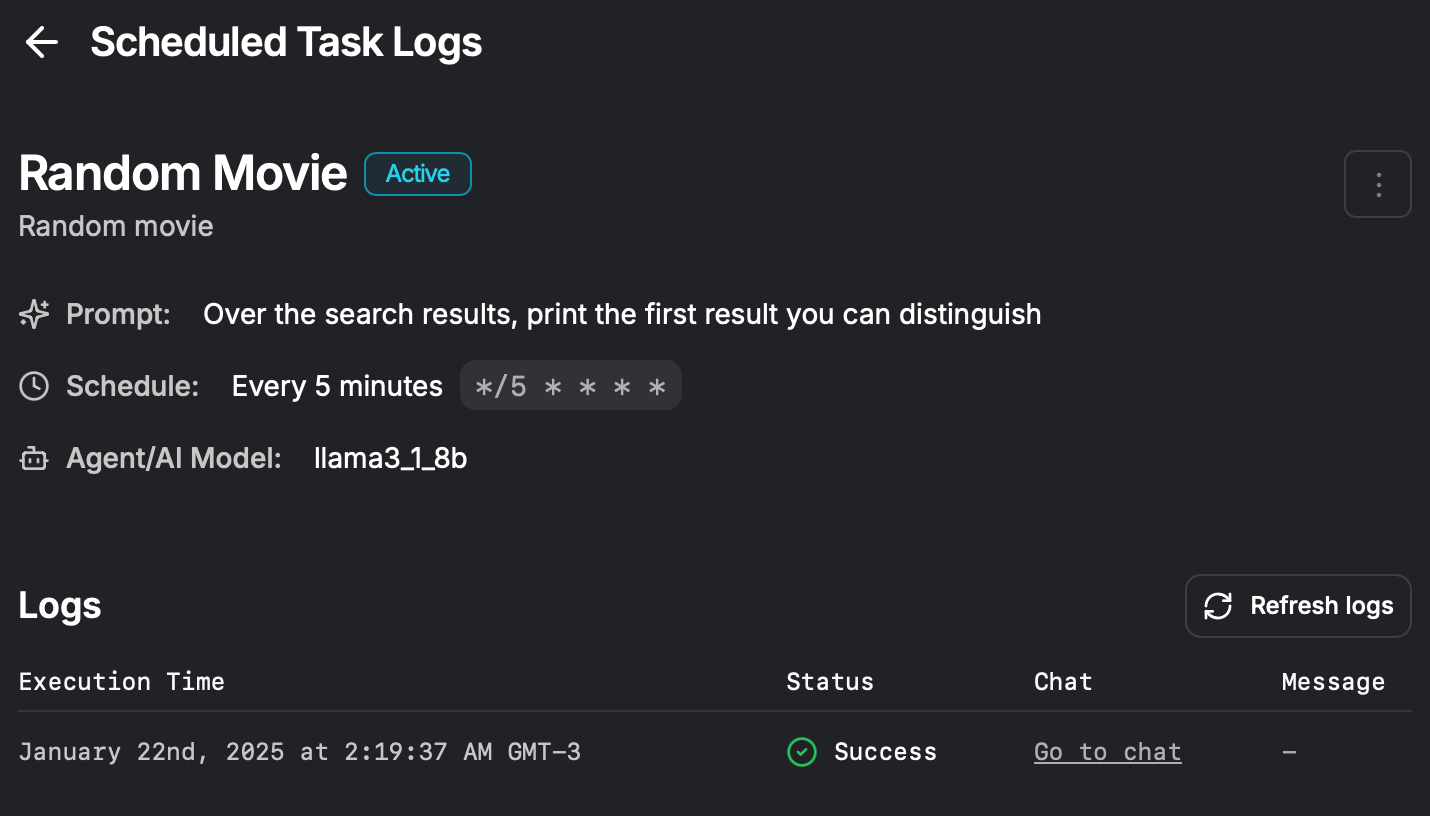
Execution logs for scheduled tasks link directly to chats, allowing you to easily review and analyze the outcomes of each task execution.
To set up a scheduled task:
- Navigate to the Scheduled Tasks section. Here you'll find a comprehensive list of all your configured scheduled tasks.
- Create a new task, define its schedule using cron notation, and configure the tools it will use.

What’s Next?
This guide has equipped you with the knowledge to enable, manage, and use tools within the Shinkai app. In part three of this series, we’ll take a closer look at creating and customizing tools, unlocking even greater potential for your workflows.
Until then, explore, experiment, and enjoy the streamlined power of Shinkai tools. Happy tooling!